Search Results
231 items found for ""
- Investing in Cryptocurrency
So you are interested in investing in cryptocurrency and Bitcoin? You are at the start of an amazing journey we began in 2017! We will teach you everything you need to know about crypto and why NOW is the time to invest. Step #1 - Claim Your FREE $10 in Bitcoin Install the Strike app on your phone and earn $10 when you sign up using our referral code 9OZTFR -- simply navigate to the link below on your mobile phone: www.coursenvy.com/strike Why Invest in Cryptocurrency? First off, we use the word "cryptocurrency" but the main asset we care about is Bitcoin. We have purchased other cryptocurrencies such as Ethereum and Solana as they are providing value in DeFi (decentralized finance) and other utility use cases, but our goal is to constantly "stack sats" and reinvest profits into Bitcoin. "Bitcoin’s long gestation and early opposition indicates it is an example of the ‘Worse is Better’ paradigm in which an ugly complex design with few attractive theoretical properties compared to purer competitors nevertheless successfully takes over a niche, survives, and becomes gradually refined." Source: https://www.gwern.net/Bitcoin-is-Worse-is-Better Why Bitcoin Over Altcoins? Bitcoin Whitepaper Read the original pitch/vision for Bitcoin created by Satoshi Nakamoto: https://bitcoin.org/bitcoin.pdf
- Amazon Seller Insurance Product Standards
Amazon Seller Insurance Requirements: https://www.junglescout.com/blog/amazon-seller-insurance Insurance Requirements For Amazon Sellers: https://www.helium10.com/blog/amazon-seller-insurance-requirements
- The Best Amazon Keyword Research Tool
https://www.merchantwords.com/coursenvy
- SamCart Review
“How Much to Build a Website” is a common question we get from students. The short answer is… it depends. But we can say we have tested MANY website builders and love using SamCart. Our SamCart review is simply A+ as the software enables us to build eCommerce shops, course websites, landing pages / lead capture pages, blogs, coaches, consultants, agencies, authors, and more! Sign up via our partner link for a FREE trial: https://www.coursenvy.com/samcart 10 Secrets to 6 Figures Training Signup for the FREE 10 Step System For Making $100k with a Digital Product: https://www.coursenvy.com/samcart SamCart Pricing Choose the plan that’s right for you and start your 14-day trial today. 7 Simple Ways To CONVERT MORE Of Your Website Traffic SamCart Review + Demo Discover how SamCart helps you convert more customers, boost lifetime value, and launch new products faster than ever. CLICK HERE to demo SamCart!
- How to Pay Zero Tax on Crypto in the USA
First off, this is not financial advice… contact your own local tax and legal professionals. But I saw this YouTube video from one of my favorite cryptocurrency/Bitcoin guys (Max Maher) and just had to share it, “How to Pay Zero Tax on Crypto (Legally)“: What You Need To Create to Avoid Crypto Capital Gains #1 – Charitable Remainder Trust — EX: Stake your crypto or invest in a real estate syndicate to fund your CRT annuity payments. #2 – 501(c)(3) Charity of Your Choice — EX: https://bestfriends.org #3 – Irrevocable Life Insurance Trust — EX: https://myersonwealth.com/products/life-insurance
- Should I Buy a Herman Miller Aeron Used Office Chair - Pros and Cons
If you have landed on this blog post, you have most likely gone down the wormhole Google search of “What is the best office chair?”, “What is the most ergonomic office chair?” I’ll save you the hours of office chair research and tell you the result. Over 95% of the office chair analysis we read and watched online claimed the Herman Miller Aeron office chair as the winner. But with a $1500+ price tag, this leads many to the second most common Google search: “How to buy a Herman Miller Aeron used office chair?” TL:DR: Buy a refurbished Herman Miller Aeron chair at SeatingMind.com – They’ve been selling high-end office and home seating for over 20 years! Should I Buy a Herman Miller Aeron Used Office Chair – Pros and Cons Let’s start with WHY the Herman Miller Aeron chair is #1 in nearly every “top office chair review”. With over 8 million sold, Aeron is the most recognized ergonomic office chair on the market. The Aeron’s design supports a range of postures, adjustability, and body types. This office chair was built for every type of human to sit safely and comfortably for extended hours. Sitting for long hours every day can lead to severe health issues. Thus, it becomes necessary to choose an ergonomic chair to assist a healthy lifestyle. First, let’s develop a little more awareness of what adversities a bad chair can mean for your health and how a Herman Miller Aeron office chair can help you avoid them all. Consequences of a Bad Office Chair Poor Blood Circulation Studies prove that sitting on office chairs that do not promote good posture leads to poor blood circulation. While standing/moving every 30-60 minutes can lower the risk of decreased blood circulation caused by a bad office chair, the benefits of an ergonomic office chair designed for optimal blood flow is key. We’ve all heard the statement “you spend 1/3 of your life sleeping” but many of us also spend 1/3 of our lives sitting in an office chair! So for your health alone, paired with duration of your life in the office chair, spending $500-$1000 on a chair is easily justified. To maintain well-coordinated movement of your body and reduce stress, you must ensure that the office chair you choose is highly comfortable and ergonomically engineered. Poor Brain Health & Lowered Concentration Spending increased time finding a “comfortable” posture leaves you with little time to focus on your work. You stay distracted, stressed, and devote most of your time adjusting your position in a bad office chair. Working in a relaxed manner with a perfect posture requires little attention; while stressed spinal nerves can lead to a foggy brain due to low oxygen supply and lack of fresh blood. Shoulder, Back, & Neck Pain Another severe problem that arises due to sitting on a lousy office chair are posture-related hazards. Forcing yourself to sit in a badly aligned chair makes your backbone less flexible and induces pain in the shoulders, neck, and lower back. Incorrect sitting posture causes compression in the spinal discs that lead to premature degeneration and chronic pain. If your work schedule includes long hours of sitting, you need to choose a chair designed to prevent back and neck pain. Buying the Best Office Chair The outcomes of sitting on the wrong office chair are pretty scary. And nobody wants to suffer from chronic back pain and poor mental health just because of a chair. It’s clear that the need to buy a comfortable, ergonomic chair must be a priority. The task of selecting an office chair begins here. You need to identify and buy the best office chair out of the many available options for sale! Most people get overwhelmed when selecting a desk chair. Now the reasons for buying a great office chair have already been made clear in the prior section of this blog post. Thus, our next step in selecting an office chair are reviewing the thousands of peer reviews online. As stated, after reviewing hours of office chair review videos and best office chair blog posts for you… the clear 95%+ winner was the Herman Miller Aeron. Voted as one of the best executive chairs, the Herman Miller Aeron office chair is an excellent and elite choice as a corporate chair. Its breathable mesh upholstered seat and back along with a set of other differentiating features like durability, adjustability (from the arms, seat height, depth, and recline), and award-winning designs make the Aeron the no brainer office chair top choice: https://seatingmind.com/herman-miller/herman-miller-aeron Key Features of the Best Rated Herman Miller Aeron Ergonomic Chair Excellent Lumbar Support A best-seller since 1994, the Aeron chair has grown more competitive in the present times with its voted “Best Lumbar Support System” that eradicates all sitting-related stress. Best Tilt Mechanism The “Harmonic Tilt” mechanism of the Herman Miller Aeron office chair follows a natural spine curve that adjusts accordingly as you move your back. Herman Miller was awarded the industry-leading Cradle to Cradle V3 Silver Level certification. Make sure to check out the Herman Miller Aeron Chair adjustment guide: https://www.hermanmiller.com/content/dam/hermanmiller/documents/user_information/classic_aeron_chairs_adjustment_guide.pdf Rounded Lip The remarkable and durable Herman Miller Aeron chair is perfectly shaped to promote an ideal sitting posture. While many office chairs cut off blood flow behind the knee, the Aeron’s rounded lip edges prevent and promote blood flow while seated. Make sure to check out the Herman Miller Aeron size chart as well for optimal sizing: https://seatingmind.com/news-1/herman-miller-aeron-chairs-difference-between-sizes-a-b-and-c Price Tag One thing that will catch your attention about the Aeron office chair is the hefty price tag. This top-rated executive chair might seem overpriced to buyers and the expensive price tag puts it out of range for many. But we found a way for all those who care about their health and comfort to purchase a discounted Herman Miller Aeron chair. The key to obtaining a cheap Herman Miller Aeron office chair is buying REFURBISHED. As you can imagine, many startups and businesses buy this #1 rated office chair, but when they go out of business, they sell these chairs to refurbishing companies to recoup some of their costs. Buying used Herman Miller chairs will get you the comfort/ergonomics you want for the price you can afford! (used Aeron chair in the video above from SeatingMind.com) Should I Buy a Herman Miller Aeron Used Office Chair? The Pros and Cons We’ve laid out why the Herman Miller Aeron office chair is the clear winner when it comes to the best ergonomic office chairs and why buying a used Aeron makes sense with its long-lasting, award-winning durability tests. But now we want to put the #1 refurbished office chair company to the test: SeatingMind.com If you are questioning the quality and effectiveness of a used Aeron chair, the following are the pros and cons of buying a second-hand chair to assist you in making an easy decision. Pros Cost-Effective The most enticing aspect of buying a used Aeron chair is the reduced costs. When you buy a refurbished chair, you choose to save an immense amount of money. New office chairs like a Herman Miller Aeron are priced way out of the range for many. Rather than buying a new Aeron chair, buy a refurbished Herman Miller Aeron office chair and enjoy the much more affordable price tag. Make sure to sign up for Seating Mind’s latest coupon codes and office chair deals at: https://seatingmind.com/great-deals Full Herman Miller Collection Even though the internet has spoken, and the Herman Miller Aeron is clearly the #1 rated office chair, Seating Mind offers nearly the entire Herman Miller collection for you to choose from: https://seatingmind.com/herman-miller 12-Year Warranty The SeatingMind.com refurbished Herman Miller Aeron chair comes with a 12-year warranty. The warranty covers the entire chair’s mechanics for 12 years from the date of purchase. Office Chair Upgrades SeatingMind.com allows you to upgrade your office chair as you wish! Upgrades include: Arm Pads, Casters, Headrests, Material choices, Chair Size choices, Color choices, and Type of chair (Adjustable, Basic, Drafting, Fully Adjustable, Side Chair) Quantity Discounts Are you looking to order office chairs in bulk for your own office? Seating Mind offers quantity discounts! Quantity Discount Form: https://seatingmind.com/quantity-discount-form Sustainability & Planet Saving Buying a used office chair signifies an eco-friendly move. Your choice of buying a used chair increases its life, thereby reducing the amount of waste furniture reaching landfills. Support Local Business Choosing to buy used chairs from local businesses like SeatingMind.com encourages them to provide more quality products at better prices which is only possible if preferred by the buyers over buying new or from giant corporations like Amazon. The monopoly retailer Amazon has ended numerous small businesses. Amazon’s unfair practices cause small businesses to either close or suffer great economic losses. AmazonCemetery.com educates the masses on how the e-commerce giant Amazon has hurt so many small retailers. Cons The only disadvantage of buying a used chair is that you’ll miss out on the certain feelings that come with buying a new product. That’s it! SeatingMind.com offers a 12-year warranty, the exact same length warranty Herman Miller offers! Make a healthier choice for your work life and an economically smart choice for your budget. Buy a used Herman Miller Aeron office chair from SeatingMind.com and enjoy all these benefits at an affordable price tag! Should I Buy a Herman Miller Aeron Used Office Chair? In short, YES! There is no reason to spend over $1500 on a new Herman Miller Aeron office chair when SeatingMind.com sells a refurbished Herman Miller Aeron chair for a low as ~$500! Plus, the strict, high-quality refurbishing process SeatingMind.com requires helps put you at ease when buying a used Herman Miller Aeron chair.
- Amazon Vine
The Amazon Vine Reviewer Program helps you get trusted reviews on your products within days and without sales. Easily enroll your eligible offers for Vine reviewers (called Voices) to request at no cost. Voices publish reviews on average 22 days after requesting your enrolled products. The program’s goal is to help brand owners acquire reviews, which helps shoppers make smarter buying decisions and can lead to an increase in page views, search click-throughs, and sales. To access the Amazon Vine Reviewer Program, log in to your Amazon Seller Central account, click the Advertising page in the top left menu, then select Amazon Vine from the drop-down menu. Vine Enrollment Fees Amazon charges a $200 enrollment fee for each enrolled parent ASIN: https://sellercentral.amazon.com/help/hub/reference/G4GZ9J4UZ35VEH6G Learn More About Amazon Vine Enroll your products in Amazon Vine to generate reviews from Amazon’s best reviewers! https://sellercentral.amazon.com/help/hub/reference/G92T8UV339NZ98TN In order to be eligible, the items you enroll must meet the following criteria: Have fewer than 30 reviews on the product detail page Have a buyable FBA offer in “New” condition Not be an adult product Have already launched at the time of enrollment Have available inventory Have an image and a description How Does Amazon Vine Program Work? How to Get Reviews From Amazon!
- How to Sell on Amazon via Amazon Arbitrage
In our Coursenvy Amazon FBA course (you can join it via our course bundle at modMBA.com) we teach you how to create a private label listing on Amazon. This is a product not sold on Amazon so it’s your own unique product… maybe you sourced it on Alibaba from China, obtained your own UPC from someone like snapupc.com, and created your own private label listing on Amazon. But what if you have a product that’s already in Amazon’s catalog such as a product sold at Walmart you bought it for cheaper than it is on Amazon… you want to sell it via arbitrage on that specific Amazon listing. VIDEO TRANSCRIPTION: So what you want to do to add your product is first you want to find that product on Amazon in the Amazon catalog. I know I have some Logitech h390 computer headsets, so I want to search that on Amazon, find the first listing that isn’t sponsored here we go Logitech h390, click on that listing and now as you can see this ships from and is sold by amazon.com So to compete with this listing and win the buy box, we’re going to have to do what amazon’s doing at minimum $24.99 price and prime delivery so that means we’re going to have to send it in to amazon fba centers for prime fulfillment or as an fbm fulfilled by merchant mail it expedited to fulfill the prime delivery requirements. So as you can see let’s scroll down here there are other sellers on this listing new and used from 19 to new at 24.99 so it looks like that 24.95 and amazon fba prime will win us the buy box that means we will be this buy box it’ll be sold by our brand name so to sell this specific listing we need the asin so that’s the amazon seller identification number so to find that that’s under product information about halfway down here product information asin so we’ll copy that head back to amazon now to add products to your sellercentral.amazon.com account in the top left menu under inventory go to the add a product page so like i said if you’re adding a private label we taught this in our course you’ll click this option but we are selling via amazon arbitrage on this already created listing just as one of the sellers on this listing so head back to add a product paste in that asin and search so here we go popped up we will become one of these sellers so first select the condition i have a new one i bought a pallet of these from walmart sell this product So i want to give it an internal SKU for myself i know this product number quickly i’ll identify that in my warehouse next i want to input my standard price so i want to beat the current buy box so i want to win the current buy box so that’ll be 24.95 so let’s start with a quantity of one i’m selling on other marketplaces as well so i don’t want to run out so we’ll just test with one condition again it’s new and here’s that option i said is it merchant fulfilled and can i guarantee that i’m going to expedite the shipping to fulfill prime or would i rather mail it into amazon fba and have them fulfill it with the fulfilled by amazon option they are going to take a bigger chunk of the pie a rough estimate 30% of the price goes to them for storage fulfilling it prime and customer service but i’m gonna keep merchant fulfilled on this one as we have the capability to ship things expedited So we’ll save and finish that to create that listing and as you can see on this manage inventory page we’ve been added to this listing we are now selling our single SKU via this asin this already created amazon listing so that is amazon arbitrage i can sell on top of that and add my specific inventory to that listing and the price i want to sell to that specific listing that is amazon arbitrage so as you can see here’s another arbitrage item that is already sold out availability zero so if i know okay great that one sold i fulfilled it i can add more units right here and maintain the price now say this product isn’t selling the best because it is fbm and it’s not winning the buy box it’s fulfilled by merchant and i want to change it to fba i can just select that product go to the action menu and click change to fulfilled by amazon then that will take you to amazon fulfillment and you’ll ship it in to their specified amazon warehouses which we also discuss and teach in our amazon fba course so that is amazon arbitrage in a nutshell. Buy a product cheaper elsewhere, sell it for a profit on amazon So for seller fulfilled or fulfillment by merchant products you will need to ship the item once the amazon arbitrage unit is purchased so to buy and print this shipping label again log into your sellercentral.amazon.com account in the top left menu select orders manage orders by default you’ll be on the seller fulfilled page this is where you will buy the shipping label and see order details for your amazon arbitrage order you can also look at your fba orders these are the orders amazon fulfills ships via amazon prime and manages everything for you so we’ll click on that and you can see all our past orders here that amazon has fully managed for us so we don’t have to do anything here so let’s go back to seller fulfilled orders and as you can see our headset sold already. This is the power of Amazon! I literally posted this 24 minutes ago for only 5 cents less than the buy box and the product has sold so amazon arbitrage is a great way to make money online so let’s buy that shipping click the order details now we’re on the order details page for this logitech headset so all you need to do is buy that shipping label print it out box up your product and ship it to your customer so let’s click that buy shipping button set your item weight and package information and then buy your shipping label if you’re uncertain of the weight and dimensions of your package you can always weigh and measure it yourself or just open up that listing again under product information product dimensions product weight okay we put in our item weight the packaging dimensions and selected our shipping service so now we just need to buy shipping and send this product to our customer.
- Celsius Network
Join Celsius Network using my referral code 1514443cd8 when signing up and earn $50 in BTC with your first transfer of $400 or more! #UnbankYourself Create your Celsius Network account at: https://celsius.network Celsius Network is the first and only platform that earns you up to 17% yield on your crypto, sends you rewards every week, and lets you borrow cash at the lowest rates. Banking on the Blockchain, Explained by Celsius Network
- Real Estate 101
After I graduated college, I began to research buying a home and to see if it was right for me. One of the first books I read was “Rich Dad, Poor Dad”. This book is a must-read for anyone new to real estate investing: Now before I get into teaching you the details of becoming a real estate investor and obtaining a mortgage (a bank loan for real estate), I want to share my opinion about owning your own home. I am in the camp of buying rental properties and using the cash flow (rental income) they produce to pay for my rent as I like to be more mobile/move often. If you know you want to live in XYZ city/neighborhood for 15+ years, then it makes sense to buy your home. The reason I say this is a home costs a lot of money. For a $500,000 single-family home, you will need ~$100,000 as a down payment (20% down for a typical mortgage) and then you have to pay property tax, all maintenance, bills, etc. I’d rather spend that $100,000 on a downpayment for a fourplex apartment that pays me $1,000 a month after expenses. So I am getting $1000 to put towards my rent PLUS the 4 tenants in the apartments are paying off my mortgage for me! Win-win! So I will be coming from the “Real Estate Investing” perspective in this Real Estate 101 blog post. Also, one more resource for you to check out… download the BiggerPockets podcast and read their blog, starting with this post, Real Estate Investing Beginners Guide: https://www.biggerpockets.com/guides/ultimate-real-estate-investing-guide/how-to-invest-in-real-estate How To Become A Millionaire Through Real Estate Investing Real Estate For Beginners + Real Estate Vocabulary The ULTIMATE Beginner’s Guide to Investing in Real Estate Step-By-Step
- How to Create NFT
A non-fungible token (NFT) is a unique digital file stored on a blockchain (a digital ledger). An NFT is a cryptographic token, but unlike cryptocurrencies such as bitcoin and many network or utility tokens, NFTs are not mutually interchangeable, i.e. not fungible. wikipedia.org/wiki/Non-fungible_token NFTs Simplified Non-fungible tokens are digital assets that contain identifying data recorded in smart contracts (i.e. the Ethereum blockchain ledger). So it’s like owning a rare baseball card in a digital format and the ledger shows a record that you own that NFT (and it shows who previously owned that NFT). You can create an NFT for free on the website: OpenSea.io All you need to get started is a crypto wallet. We suggest and personally use MetaMask.io You will need to create a MetaMask wallet and fund it with Ethereum (ETH) before buying/selling on OpenSea. MetaMask is the oldest, most trusted crypto wallet. Navigate to metamask.io and click the download button. Select your desktop browser or mobile device. How to Create NFT Art How to Create NFT Art + OpenSea Tutorial on Selling NFTs from Coursenvy.com Seed Phrase Your “Seed Phrase” is the backup to your wallet. You will need to write down these secret words (in the correct order) and save them in a safe location. Save a backup in multiple places. Never share the phrase with anyone. Compare your seed phrase to your credit card number! Fund Your Wallet In order to buy, create, and sell NFTs on OpenSea, you will need to have some ETH in your wallet. Click the “0x…” number at the top of your MetaMask account to copy your wallet address (this is where you will send ETH). To learn how to buy and send cryptocurrency (plus get a FREE $10 in Bitcoin), read our in-depth guide at: coursenvy.com/coinbase FREE Cryptocurrency Course Learn more about NFTs, cryptocurrency, and get $10 worth of FREE bitcoin in our top-rated course: https://www.coursenvy.com/cryptocurrencies
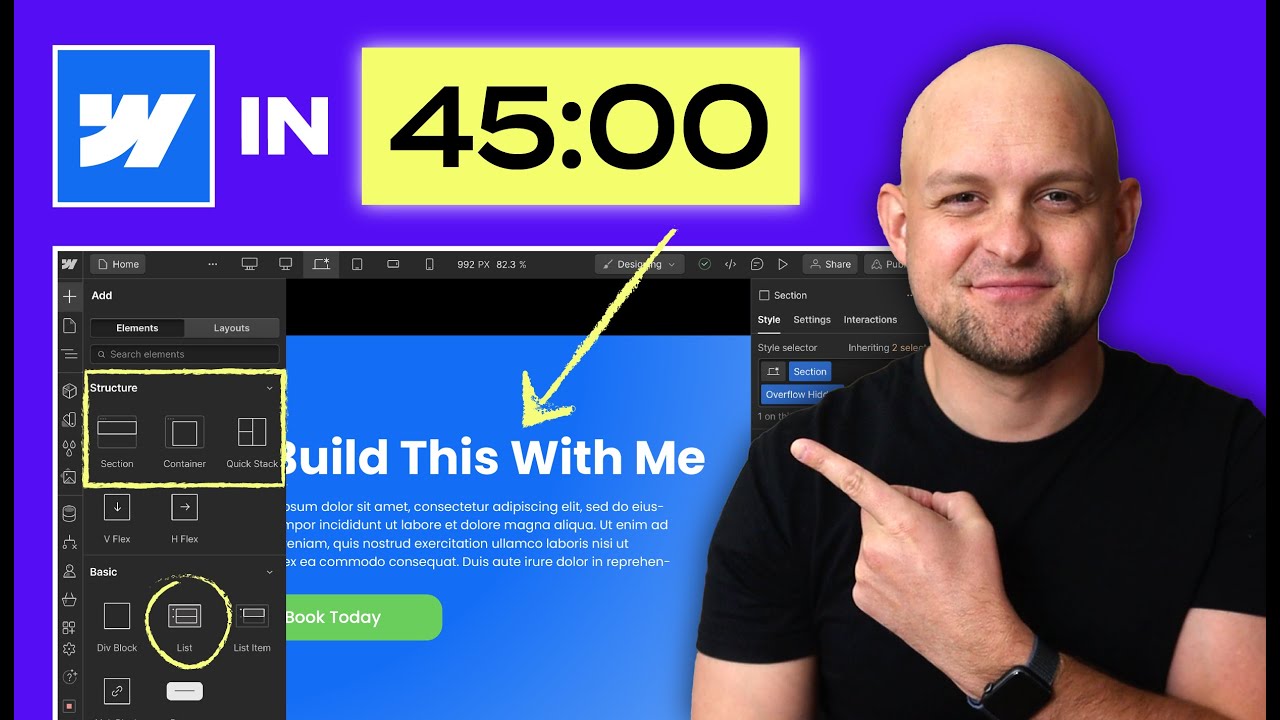
- Webflow Tutorial
Webflow is the modern way to build a website! With it, you can build an entire website with NO code by simply adding and editing elements to each page of your website in Webflow’s easy-to-use builder software. You’ll build responsive websites right in your browser window and then launch them live on the best cloud hosting service (Amazon Web Services provides a global infrastructure supporting millions of sites, while Fastly delivers your content in milliseconds.) In this blog post, you’ll learn how to create a website in minutes with our Webflow tutorial. Click the button below to claim our FREE Webflow promo code: https://www.coursenvy.com/webflow-promo-code Step #1 – Sign up for FREE with our Webflow promo code: https://www.coursenvy.com/webflow-promo-code Step #2 – Sign up for the FREE Webflow 101 Course Step #3 – Learn what Webflow can do for you: VIDEO TRANSCRIPTION: today we are covering a super comprehensive webflow tutorial that is going to take you from complete webflow beginner and amateur and give you all the tools that you need to get in create an account build a website and then publish it and take it live so we're going to cover everything in this video i know there are a lot of other tutorials out there but my goal is that this one is going to be quicker more efficient it's going to show you the most important things that you need to know and then it's going to help you get a website finished and live faster than any other tutorial so let's jump into it we are here on the webflow homepage and the first thing that you're going to need to do is click get started and all webflow is going to ask you for is an email and a password you can sign in with gmail or just click this blue button to continue with any type of email once you sign in webflow is going to take you to this next page where it's actually going to ask you for your name or how they should greet us and then they're going to ask us a couple questions which is going to put us in the right direction for what we're trying to accomplish with webflow and so what best describes your role we're going to put web designer who will be building the site for i'm going to go ahead and put my business for starters and then do you have any experience building websites let's just put used website builders what webflow's going to do is it's going to process what we're trying to accomplish and it is going to throw us into a good scenario where we can get done what we need to do so what it's going to do is give us the option to either do a business starter which is just a basic template or a blank site and in this example we're going to go ahead and move forward with the blank site and webflow is going to launch us in to the designer now the designer is where everything happens once this loads you're going to see our big white canvas that's overwhelming we'll close out of this tutorial and this canvas is where we're going to design our website okay now before we can dive into that and before i show you an example of a quick website we're going to build you need to understand all of the tools first over here on the left side you have your main webflow tab which is going to take you either back to your dashboard to see all of your different websites or take you into the individual website settings which is where you're going to manage hosting plans and setting up your domain and different things like that and then you've got your editor which is just a more simplified version of your designer here where you can just make adjustments to text and images and then your cms items which we'll talk about here in just a minute the next thing that you've got is your add button right here now this is going to be very similar to other website builders that you've used because you're going to be able to select the elements that you want to put in your site and you're just going to drag and drop and so for example you've got your layout which is your sections your containers your columns you've got basic elements which are your div blocks lists and buttons you've got all of your typography your cms which again we'll talk about here shortly we've got all of your media so images and videos and then of course lottie animations which are really really awesome but a more complex topic for another video you've got all of your form elements here and then you've got some additional components and so in this example just to get started we're going to go ahead and move a section over here into the body now i want to take a moment here to explain to you the way that web flow works webflow works on something called the box model or that's known as the box model what that means is every single element within your website everything down to the text and the images is a box within a box within a box okay so that means is rather than using your body here and just dragging a heading right into your body which makes no sense what you're going to actually do is you're going to work with this box model by taking the section and then i'm going to put a container within the section and i'm going to put my heading within the container now this is um gonna be absolutely necessary for a number of different reasons but the number one reason is so you have more design capabilities because if you put everything within your um your home page or your body block if you make any sort of adjustment it's going to change every single thing within your body block okay and so now that we've got this set up what i'm going to do is i'm going to turn on these guides down here so you can kind of see these different boxes so we've got our h1 we've got our container we've got our section and then our body and so that's how we're going to have things set up okay and so before we move forward with this example a couple more things that you need to understand are number one the navigator which is a super easy way for you to basically see the elements in this box model like we talked about right we've got our body our section our container and our heading but you're going to be able to see every single element on your page within this navigator which makes it easy to find elements it makes it easy to reorganize things drag and drop things let's say i want um you know for example let's take this section and we duplicate this now you're going to be able to see both of these sections in the box model and say i want to drag one above the other i'm going to be able to make any changes like that in the navigator and this is going to be a lot more important a lot more useful when you have a ton of different sections and a ton of different elements on your page so i'm going to go out and i'm going to erase this section that we just made and the next thing that we're going to dive into really quickly is the pages tab now this is pretty obvious you're going to be able to bounce back and forth between your pages you can create new pages you can actually create folders to organize your pages and then of course you can get into each individual page setting and adjust your title you're going to be able to adjust the link slug you're going to be able to make changes to meta descriptions and your open graph url images the next thing that we've got over here is our cms collection which again cms is a more complex topic for another video it's not something that you're going to need in your first website but to give you a basic idea of what this is and when it's used when i build a website for a client that has a blog in it i don't want to hand over this website and tell them every time that you have a new blog article you're gonna have to go into the site create a new page redesign the page and then put in your text so instead what i can do is i can create cms pages with cms items and i basically tell webflow exactly how i want the content to be designed and laid out and then once i design it once i actually pass the cms dashboard to the client and then they just go through and fill all the fields so they put in the title they put in the body content the images a thumbnail image anything else that they need to and once they click publish webflow actually uses your cms pages to duplicate that content they implement it into the website with the design and everything that you've already done which saves a ton of time and gives you a lot of capabilities you can also use cms when it comes to adding or removing team members maybe you have products on your website blog articles are a really powerful way to utilize this and that's again something that we'll dive into in another video but the last things that you're going to need to know obviously you've got your ecommerce button which we're not going to use because this isn't an ecommerce site you've got your assets where you can upload images and videos and then of course you've got your settings right over here all right we are moving along and we are going to start talking now about this right side toolbar which is where the magic happens okay this is where everything to do with the design and in the visual appeal of your website any adjustments that you need to make to sizes and alignment and padding and spacing and all these different things are going to happen right here okay and the first thing that you're going to need to know which is really at the core or the foundation of webflow and is probably the most powerful feature that webflow offers is your selectors here and this is where we're going to be utilizing classes to streamline the design of our website and so to give you an example of this we've got a heading right here and we're actually going to give this the class of home page heading okay now what this means is now every time a title anywhere on the website that shares this same class anytime that you make an adjustment to that whether that's to the font or to the size or to the color or to the background whatever it is those changes are going to be made to every single title that shares this class and so to give you a good example of this i'm just going to copy and paste this over so both of these headings you can see over here they share that same class and so when i blow up this text it's going to to do it to both of these titles because they share that same class so let's say this is the heading we want to be really big and we want it to be really blue so we want to be big and blue it's going to make adjustments for both of these that but let's just say that for the sake of this these are both headings on different pages this one is the home page but this home page heading we actually want to add a sub class because we want it to be a little bit smaller so what i can do is i can add an additional class to get more specific about the design of this heading so still if i go back to this main homepage heading class every change that i make is going to happen to both of these but now that i've added a more specific class to the second one called smaller smaller tiny when i make adjustments to this it's only going to change this individual title and so this gives you a really good idea of how you can streamline all of your titles all of your body text all of your sections all of your div blocks whatever it is you streamline those across your website so anytime you make changes it's going to make those changes across the entire site now an example of this is one of my early on clients i built them a site in wix and they actually went back and said we love everything but we want all the titles on all 50 pages to be in all caps now i'm sure that there's an easier way to do this on wix and i was probably a dummy back then but i actually had to go through to each individual page and retype the headings in all caps now in webflow what i would done to get that done faster is i would have just clicked this main heading that shares the same class as all the other headings i had to scroll down here and clicks capitalize and it's going to capitalize all those headings but then for whatever reason if i have this other heading that i'm like you know i actually don't want this one capitalized because it's got this additional class to get more specific i can actually untoggle that all capitalized heading and it's going to adjust just that single heading so that's the way that these selectors work and it's important to remember that they don't only work on headings they work on literally any element so any element that you find over here whether that's a section a column a link block a heading an image a form block whatever it is you can add classes to streamline your design process okay now once you've done that the next important thing that you're going to need to understand is your display or your layout options and this is again going to be the foundation of the design of every single element okay and so to give you an example of these i'm actually going to add a little bit of padding to this section to make it a bigger example for you and what i'm going to do is i'm going to drag in a div block and let's go ahead and erase these headings i'm going to drag a div block into my container so again using the box model and i'm going to show you these and this div block i actually want this to be 100 pixels by 100 pixels so we're going to make a square okay now what i want to do is this is titled div block i actually want to add a actually i'm going to duplicate this after i add a background color let's go ahead and make this guy blue i'm going to copy and paste this and in my second div block i'm actually going to do a more specific class titled red and now i can change the background of this and we've got our red block a red block and our blue block within this container now because the container is what's known as the parent element that is going to determine the layout of our boxes or or our elements within that container and we do that with the display settings and so what we've got is our block element display setting which is just the default and then what we have is our flex lat which is the one i use 99 of the time now you can see when i click that it actually gives me a ton of different options whether i want to go horizontal or vertical let's say that i want to do vertical i want to be in the center and then for the sake of this example i'm going to go to the container and make this container 500 pixels tall and so now when i'm adjusting this i can actually have have it tell the container how to space out these blocks so maybe i want them smushed to the bottom or smushed to the top or right to the middle and to the left and you can see how making these adjustments is going to move these children elements or child elements around the other options that you have are your div block which again is just going to add more boxes to our box model you've also got your inline block and then your inline options which again are are used in in very specific scenarios but for the sake of your first website really you're only going to need to know how to use this flex layout okay that's a really powerful way to make adjustments to all of the the blocks with inside a bigger block now what i'm going to do is i'm going to keep these div blocks but i'm actually going to come back in and add a heading within this container and let's make this vertical bring the heading to the top and then i'm going to blow this heading up so it's really obvious to see and the next thing that i'm going to do is i'm going to come over here into my ad and i'm going to add a paragraph this is going to be my subheading now i want this to be a little bit shorter so i'm just going to delete some of this text and what i'm going to do is i'm going to blow this up to let's say 25 give it a little bit more line height and what we have now is our heading and our subheading now the next important thing that you're going to want to understand is your spacing and this is really self-explanatory but a really powerful tool because you can actually adjust the padding on the inside of a box or on the outside of a box and so you'll notice that by default this heading has margin on both the top and the bottom 20 pixels on the top and 10 on the bottom if we want this heading to have more space underneath that i can actually click and drag this out and you'll see how that is making space between the bottom of the heading and the top of the subheading okay now you can also edit or adjust the inside of this by clicking and dragging these and you'll see what that does and actually i'm going to hold the shift button and do all four you can see how it's pushing this heading into the middle of its own box now that's not something that you're going to want to do very often with text but something that very often you'll want to do with a div block because if i actually move this heading inside the div block you're going to see now that that heading is within that block and if i adjust the inner padding it's going to push that out like that and give padding between the heading and the div block that's a really good example or use case for using that but those are going to help you make all the adjustments that you're going to need to make as we scroll down we've got a couple things as far as your overflow and fit which you won't have to worry about too much on this first build same with position but as we get down here then you've got all of your adjustments as far as typography and then you've got your background a background is a really powerful tool because there really are two ways to add images to your website number one is to drag images directly in or number two is to use an image as a background to show you how this works first i'm just going to drag a regular image into our container here and click choose image and that takes me immediately to my assets tab to where i can upload an image and that will load in and there i have got my image and so typically images are going to fill up the box that they're found within but you can actually have the option to drag to the size of your image or of course up here on the right toolbar you can adjust the width and the height okay now one issue that you might sometimes run into is if you want this width to be let's say 400px your container let's say that it is set to stretch actually let's go horizontal and stretch and so what you're going to find is sometimes it can get frustrating when you set the width but because of the display of the container it's going to stretch that image okay and so a couple different options you have is obviously you can come in here to the image and you can try to guestimate the height in pixels and just keep doing this until you find the right height but this is an absolutely crappy solution and so the other options that you have is you can determine your layout and maybe you just want to push everything to the top and that will automatically fix that image but one thing that i also like to do with images if i'm trying to get a background so what i'm going to do in this example is i'm going to take a div block place it in here i'm going to set it to let's say 400 pixels and the height is going to be 300 pixels now what i can actually do is scroll down here to this backgrounds image and gradient and i can click the plus here and i can choose an image and actually input this image into the background and what i can do is press cover and that image is going to fill this div block okay now the nice part about this is when i make adjustments to that div block let's say that down here i want to adjust the radius let's take that to 100 you can see how the radius changes on the div block and the image of course only fills that space and so it'll round the corners of the image as well now this is kind of nice because you can also adjust the width let's say to 500 px to 600 px and it's going to just continually fill that div block with that image this background feature is especially useful when you are working with your sections let's say that this section is going to become our main hero section on our homepage what i can do is make sure this section is selected click my background image here and then i can plug in this image set to cover again and then i can set this right to the the middle position and just like that we've got a great background image where our text is running over the image now obviously there's not a whole lot of of contrast here and so what we can actually do is come back to the image and gradient i can actually add a second image or gradient and what i can do is set a solid color overlay and then i can actually adjust the opacity of this specific color just like that i can make the background dark come in here back to my text and i can change these colors of course and just like that i have a nice dark background image with my text overlay and then i'm well on my way to creating a nice hero section and a nice home page and so the image and gradient tool is really really useful you can also get in here if i erase both of these you're actually able to get in here and also set a gradient and you can adjust the colors and and really do whatever you like with this to get things looking exactly the way that you would like them to so after the imaging gradient down here we've got just a couple other features we've got our radius our borders which are pretty self-explanatory and are going to be easy for you to learn we've got our opacity and other effects down here which again are nice to use you can click those and see how they affect the different elements on your site but they're not things that you're gonna have to use very often okay um so what we're gonna do now is click over here to this cog me this is just a secondary um settings menu that's gonna give you more settings when it comes to your individual elements for example your header you're gonna be able to choose you know as a h1 h2 h3 you're going to have different different settings throughout this tab but again not one that you're going to have to use super often and then of course over here we have our style manager which is very similar to our navigation tab on the left but it's showing just our styles and our classes and then the last one is our interactions which again is a video for another day but you're going to be able to access all of your interactions right there and get things to move and change as you scroll through your site or when you click on different elements which is a really powerful feature so now that we've covered these things the last thing that i want to cover before we jump into our site settings are up here at the top obviously we have our different viewports widths and so we can actually see things in our desktop our tablet our mobile landscape and then in our regular mobile portrait so as you click on these it's actually going to show you how things work and how they're going to look in these different viewports and so obviously if our heading is massive on our desktop but when we come down to our mobile it's way too big i can actually get in here and just change this i can shrink it down a little bit to make sure that it fits and you'll notice that it's not going to change that in the desktop version so i can start to design for different viewports obviously designing for mobile is super super important but you're going to have complete control over the way things interact you can change literally anything and it's going to look differently in mobile than it will in desktop which gives you so much power and that is one thing that has been a big struggle for a lot of designers using builders like wix or squarespace because they just make it really difficult to have complete control over the different um you know the website the way it looks in different viewports okay so up here in your top right you have your publish which this is automatically going to publish to a temporary domain which makes it really easy for you to see the live site and also send a temporary link to a client so they can kind of follow your progress you also are going to have the ability up here to click on your little eye and this is going to give you kind of a live view of the site within the designer which is very very useful okay so before i dive into a design of a very basic landing page what i want to do is take you up here to the project settings and show you all the important settings that you need to know when working with webflow okay you've got your general tab here which is your site name and your and your temporary sub domain name which you can adjust as long as it's one that's available you're going to be able to use whatever domain you like down here you've got your favicons and your web clips to set the image which of course shows up here in the tab and in other locations then you've got a couple additional settings down here including your site statistics which is going to show you views unique visits different things like that clicking over here we have our hosting where you are going to choose a hosting plan now the way that web flow works is on a free plan at any given time you can have two sites that are unhosted in the development stage so what that means is you can have two at a time once you select a hosting plan and connect a domain to one of those that's going to open up one of your slots so then you can start a new website to be in the development phase and be working towards hosting that and taking it live okay so when it comes to your site plans there are really only two site plans right now that you're going to need to worry about and that is your basic and your cms again cms is going to be necessary if you have cms items implemented on your website if you purchase a webflow template or you find a free one chances are that those are going to have cms items in that site so unless you delete all of those cms items you're going to have to choose this more expensive hosting plan the one kicker is i always use this cms hosting plan because it also has gives you access to your content editor dashboard which is something i passed to my clients so they can make adjustments to their site they can manage form submissions all of those different things but if you are making just a super basic site no cms items you're not worried about sending an editor dashboard to a client for example this is for your own portfolio site this may be a good option to go a little bit cheaper on the hosting obviously these are cheaper on the annual plans if you flip them to monthly and you're paying month to month it's going to be a bit more expensive but either way you're going to be happy with either of these plans just keep in mind that if you want to use those cms items and the cms structure or the content editor dashboard you're going to have to choose the cms hosting now the thing that i love about this you're going to be able to connect your custom domain down here even if this is for a client site you're going to be able to connect your domain but as we come over here to the billing section you'll notice once you set up your personal billing you have this option to do client billing now what that means is if i build a site for a client i don't want to have to pay their monthly hosting out of pocket and then hope that they reimburse me for that so what you can do is you can plug in their information their name their email their phone number and then that's going to generate a link that you can then forward on to your client where they can put their own credit card information in to pay their hosting now client billing has a lot of cool settings where you can actually upsell them and let's say that they choose the cms hosting that's twenty dollars per month i could actually set the price at twenty three dollars per month and then webflow would give me that three dollar difference which is a nice upsell option it's not something i do very often because i want to keep my clients hosting prices as low as possible because they're already investing with me and other monthly services and an extra three bucks a month doesn't matter to me as much as keeping my clients happy but you've always got that option okay you've also got the seo tab which gives you a couple seo settings you've of course got your fonts your backups which you can restore an old version of your site and then you've got your custom code section and so with this you really have a good understanding of all of the settings that you might need to know or to understand and so what i'm going to do now is i'm going to dive back into the designer and we're actually going to build a really quick landing page to show you all the things that you've learned in this video so let's jump into it right we are back into our designer and i'm actually going to erase everything that we've done so far so we have a blank canvas and what we're going to be doing is creating a really quick and simple landing page i'm going to show you a couple additional tricks throughout this part but in just a few minutes i'm going to give you a really good idea of what can be built in web flow okay so we're here at our body box and what i'm going to do is i'm going to add a section and down here in the height one thing that i always like to do is set this header section to 100 vh which means the viewport height okay so what that means is that the height of the viewport is going to change based on the size of your screen but i always wanted to cover the entire screen okay now what i'm going to do is i'm going to drop down here to the image and gradient we're going to give a nice gradient background so what we'll do is let's give this a kind of a deep navy blue and on this color let's give it a lighter blue and then what i'm going to do is i'm going to use this little circle here to adjust the direction of that and i have my hero section i'm actually going to change this class to hero section and then what i'm going to do is i'm going to bring in a container now notice that the container automatically pops to the top and the reason for that is within my hero section i have the display set to the default which is block and so what i'm going to do is i'm going to come over here and select the flex layout i'm going to go vertical and i'm going to put this thing right smack dab in the middle okay now with that in the middle i'm going to bring in a header within my box and so again just as a reminder over here in the navigator we're starting to work on our box model it's a box within a box in a box and so within or with my h1 i'm actually going to turn this white and i'm going to blow this sucker up to let's say 90 i want to increase the line height just so i'm not squishing that text and let's title this webflow tutorial the next thing i'm going to do is i'm going to grab a paragraph for our subheading and i'm going to put it inside the container as well now obviously that text is too small and there's no contrast so i'm going to turn that white let's blow this up to maybe 22 increase the line height i'm actually going to shorten this text a little bit so you can get a better idea of what it would look like um and so just like that we've got our subheading i want to add a little bit of a margin beneath the header so let's increase this to maybe let's go 30 right in the middle and then what i'm going to do is i want to add a call to action we haven't worked with buttons yet in this tutorial but they are really simple to use i'm going to drag oops i actually grab the form button right here i'm going to grab the the button under my basic tab plug that in and this is my default button now what i want to do is i actually want to turn this thing green so there's a little bit more contrast so right there i turn it green and i want to increase the font of the text in there to make it a little bit more noticeable and then what i'm going to do is i'm actually going to increase the padding inside this button and again when you increase the padding on the inside you'll see how that that increases the space between the text and the basically the form of the box and so once i blow that up i'm going to make my call to action learn uh let's see learn web flow today an exclamation point i want a little bit of padding on top of this a little bit of a margin just to give it some space so let's go 20 right there and then i actually want to add i'm going to scroll down here and add a radius to this i actually want to go 100 to make that completely rounded now with things like buttons you actually have a lot of options when it comes to the hover effects because obviously when people hover over a button we want them to know that it's a button and we want it to change a little bit to i guess validate that it's going to do something when they click in so when i click on this button i can actually go up here to my selector tab and if i click this it actually gives me the different states of this button so if i click hover right here you'll notice that this adds a temporary class selector for hover now what this does is i can change this so let's say i want this to go a little bit brighter when they hover and then i'm actually going to exit out of that by just clicking anywhere and it removes that temporary green selector now anytime i hover over my button it is going to make that button change colors okay that's a really nice feature to add to really anything you can have you know it change as you hover or scroll past it but just like that we have our call to action i'm actually going to make the text a little bit smaller and we are good to go okay now the next thing that i want to do is i'm actually going to throw in a nav bar up here at the top and again i want to make sure within my navigator my navigator tab that my nav bar isn't accidentally inside my hero section nav bar works much like a section where you want to be directly in the body box and so one thing about the navigation is these can sometimes be janky when you pull them directly in from your add button and so you may have to make a couple adjustments but what i'm going to do with this nav bar is i actually want to make it black for starters to make it really stand out and then up here on my nav links i want to turn these white now you'll notice when i turn this white only one at a time turns white that's because the other ones don't have a class selector yet and so when i turn this white it automatically gave the class selector of nav link i'm actually going to come through and paste this same selector into these other nav links and so now when i change them because they share class they're going to all change together so i'm going to give those an underline the same font size and there we go so with that what i want to do in this brand link is i actually want to bring in a logo so i'm actually going to click here go to my image and drag a logo into here i'm going to be able to choose the image now let's pull this from one of my images and it's going to bring in this client yet now you'll notice that this thing is absolutely massive so i'm going to want to drag this down to a size that fits now one thing that you'll notice is it's sitting kind of janky in there and so these are some adjustments that you might have to make with these types of things but let's say that i want to make my height of this 60 pixels and i actually estimated that the first time where it's going to go the full width of my navigation and then within that brand i can actually switch this to flex and move that logo right to the middle now a quick little tip for you you'll notice that this logo doesn't like there's not a whole lot of contrast on that black background you can remake the logo and make it all white or change the colors to add more contrast but another thing that you have the option to do is you can select this image scroll down here and in your filters under these effects you can actually select a filter and one of the filters is inverse now you can see when i do this it's actually going to invert the colors and add a little bit more contrast to that logo so there we have client earth okay now the once i've added this nav bar you'll notice that it's kind of pushing my um my hero section a little bit too low and so i actually might want to come and make this only 90 percent of the viewport height that way it's not getting too deep because i don't want to waste real estate on my website okay the next thing that i'm going to do is i want to add a strip or a section that's going to highlight my other clients logos and so i'm going to add a section in here again if we look at our navigator i'm going to close all these and you can see we've got the nav bar the here section and now we have this new section that i'm actually going to give a class for client logo section okay now because we're using our box model i'm going to come down and put a container inside of that and i actually want to give my section a little bit of padding here just so we have something to work with and you can see once i get that padding it actually pushes that into the middle and gives us some space to work with now what we're going to do is we're actually going to implement the grid layout and so i'm going to plug this grid in here and you can see that automatically gives you a 2x2 i actually want to come over here and delete one of the rows and i want to add two columns and so i've got my strip of four boxes there now what i'm going to do is i'm going to come to my images i'm going to slide an image into this grid and i'm going to choose some client images for the sake of this they'll be the same as our main logo and then i can actually copy and paste these all the way through and there i have my client logos now let's say that i feel like these are a little bit too big what i'm going to want to do is actually give these a class and then i can set a let's say our max width is 80 percent and you can see that that starts to shrink that down to only eighty percent of the box now it didn't change the other ones because they don't yet share the same class and so what i could do is copy and paste this class to the other images but what i'm actually gonna do is just erase these because now that this first one has a class set i can copy and paste it and it will paste with the client logo selector class okay now because these are all on the like they're aligned left within the box i can actually double click on my grid actually i don't need to double click i can come right up here to a line and i can center all of these within that and just like that i have my client logo section if i want to add a little bit of space between them i can double click then and i can add maybe 25 pixels between columns and just like that we have our client section the next thing i want to do is come down and add a third and final section and this is actually going to be our form section now again i'm going to put a container into this section i always like to give myself a little bit of padding in these sections to give me room to work with and then within my container what i'm going to do is i'm going to bring another heading now this heading is going to be my h2 because it's obviously not the main idea but i'm still going to blow this up to a reasonable size and you'll notice that it automatically gave me a class of hitting three which doesn't make a whole lot of sense so what i'm actually going to do is i'm going to call this my form uh section heading so my form section heading and what i'm going to do is put contact us today okay now i'm also going to want to bring in some text and actually what i could do is i could copy and paste this white text from up here and one thing you can do is it's it's already got a class but i could add a secondary class to get more specific uh titled black and then i can change this to black without losing any of my design i'm gonna give a little bit of margin beneath this header down here maybe 30 pixels now we've got our contact us today i want there to be a little bit of contrast between these two sections and so i'm actually going to give this a background of a gradient but i'm actually going to give it just a very slight gray just like that and then on this end i actually want it to go a little bit just a hint of red and i'm going to align that this way and the next thing that i'm going to do is i am going to add a contact form and so i drag and drop the contact form in here and obviously it's automatically going to style this and just make it fit our column and so the first thing that i want to do is i can actually select this blue and i want to go to the main block of the form which is the form block and the first thing i'm going to do is sit and set a max width of 400 pixels and that is going to limit the size of our contact form okay now i want these text fields to be a little bit bigger and more friendly so i'm going to set a height of 60 pixels and a height actually you know what i'll do is i will just share this class of text field in here and do that so we've got our name and email i actually want to add a phone number field so i can do a lot of copy and pasting add in my phone number field i'm going to double click that and just verify that this is the phone and i can click that this is a phone field and we're getting closer to having our form i actually want to make this button full width so i'm going to click on it i'm going to change the width to 100 percent i'm going to give it a little more padding in there and i want this button to be a nice deep blue i'm going to increase the font size on that button and double click to change the message to send message all right so what i want to do is i want to add a little bit more style to these so the last thing that i'm going to do and this might be a little bit extra but i'm actually going to remove the background color and make that completely opaque i'm going to come down here and i want to remove the borders and i'm going to give this one bottom border i'm going to blow this up to 3 pixel width and just like that our form is a little bit fancy with just those bottom lines okay now i'm not really liking these field labels so i'm actually going to get rid of these field labels and what i can do is i can actually double click on these forms and in my placeholder i can have there be a placeholder so i don't need a title so i'm going to put bone for this one name for that one and email for this one and then what i can do is i can blow up this font size and i'm going to make that bold and just like that i have kind of a fancy form now if i click my preview you can see the way this works when i click on it i can still input these forms and just like that i have my fancy form that i can submit so going back the last thing that i want to do is i want to make all this centered and so i'm going to go back to my container and i'm going to name this center container and then i'm going to go to my flex vertical right smack dab in the middle now you notice that that kind of squishes my form in the middle so what i want to do is i want to click my form make sure that i grab my form block which is the main like the biggest box of my form i'm going to select that and i have a max width of 400 pixels but i want to make sure that it's at least 350 pixels and so what i'm going to do is just set the the width to 350 pixels that's going to make it a little bit bigger and then of course i want a little bit of margin on the top to give me some space and just like that we have our contact us form okay and so just a couple like really basic things that we've gone through really are giving you all the tools that you need to plug things in and start building a website if there are things that you don't understand with webflow the best part is is you can just start clicking around and see how different settings change different elements right and so it doesn't matter which of these elements you're adding to your project you're always going to be using your classes to set a standard for the design that they are going to take and then you're going to be able to adjust your layout your display and then you've just got all the size position typography background all these are very self-explanatory to get you to the point where you have a design that has everything that you want and it is completely custom everywhere from the desktop version down to the mobile version you're going to be able to build out the site of your dreams okay so with that we have covered basically everything that you're going to need to know to dive into web flow start designing a site obviously like anything it's going to take some practice especially if you want to get to the point where you're building like knockout websites you're going to have to put some time into practice and so what i would suggest you do is dive in spend some time just seeing how things work seeing how different tools and different settings change the layout of the different elements and before you know it you are going to be able to see or think of a design jump into webflow and just knock it out and create it in in a matter of minutes okay so if you have any questions after this tutorial make sure you comment them down below i'd be happy to help you out but the last thing that i would say is i have designed websites in so many different website builders from wix to wordpress to squarespace and without a doubt webflow is the most powerful and easiest to use yes there is a little bit of a learning curve but if you truly want to build incredible responsive websites and have complete control over the design and the performance of your site there is no better place to be than with web flow and so if you have any issues getting started or you run into any roadblocks webflow offers so many free courses and free videos and they have a an awesome support team they have an incredible facebook group the the global web flow group that you can join and you've got nearly 10 000 people that are ready and willing to help you out if you're interested i also have a facebook group that is called seo and webflow and that is actually a group specifically for those that want to learn how to get their webflow sites built and get them to rank on google so if you're interested in that there will also be a link down below but thank you guys so much for watching dive in learn webflow it'll change your life i guarantee it and we'll catch you guys in the next video